
Хотите научиться делать красочные помпоны? Статья на wikiHow расскажет вам 3 способа, как делать помпоны своими руками. Независимо от того, для какого проекта вы нуждаетесь в помпонах — декорирование одежды, аксессуаров или интерьера, эти методы помогут вам создать красивые и качественные помпоны.
Download Article
Download Article
Pom poms come in a few different varieties. There are the pom poms that are used to accent knit and crochet projects, pom poms that cheerleaders use, and tissue paper pom poms that are used for decoration. You can make one or all three of these types of pom poms with the right materials.
-
1
Cut out two cardboard circles. Cut out two cardboard circles and then cut out a wedge and a small hole in the middle of each circle so that your disks look like they have keyholes. Remember, the bigger the circles, the bigger your pom pom will be (and vice versa).[1]
- You can cut out a circle freehand or you can use a bowl or glass as a guide to trace the area you want to cut and then cut out the circle.
-
2
Place a piece of yarn between the two cardboard circles. Place a piece of yarn so that it is going around the keyhole and then place the other cardboard disk over the yarn. Arrange the circles together so that the keyholes are lined up.[2]
- This piece of yarn will serve to secure your pom pom later on. Make sure the piece is long enough so that the ends hang out on either side of the keyhole.[3]
Advertisement
-
3
Wind the circles with yarn. Insert the yarn through the wedge and into the center of the circle. Then, begin wrapping the yarn around and around the circle. Wrap the yarn around the circle about 100 times or until the yarn is as thick as you want it to be.[4]
- The thicker your yarn is, the denser your pom pom will be.
-
4
Cut the yarn. Put the scissors in between the two circles of cardboard and cut open the wound thread or yarn around the outer edge. Go slowly and cut evenly.[5]
- As you cut the yarn, hold onto the ends of the extra piece of yarn that you placed between the cardboard circles. This yarn is what will secure the pom pom.
-
5
Tie the extra piece of thread. Tie and knot the ends of the extra piece of yarn. Because of where you placed the yarn before you started, it should be in the perfect position to hold your pom pom together.[6]
-
6
Remove the cardboard disks. After you secure the pom pom with the extra piece of thread, you can set the cardboard disks aside. Keep in mind that you can reuse these disks to make more pom poms, so do not discard them.[7]
-
7
Trim the pom pom. Trim around the outside of the pom pom to even out the threads. Keep trimming until you are happy with the look of your pom pom. Trimming will make the pom pom fluffy, dense, and round.[8]
- Make sure that you do not trim the ends of the yarn that you used to secure the pom pom unless you do not need them.
-
8
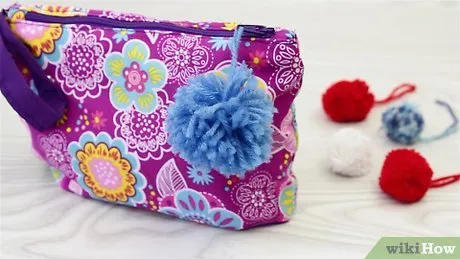
Use your finished pom pom. You can now use your finish pom pom by attaching it to a knitting or crochet project. Use the yarn tails to attach it to a hat, scarf, sweater, or whatever you want.

Advertisement
-
1
Layer 10 trash bags on top of each other. Trash bags are usually only available in white and black, but you may be able to find other colors, too. If you are using different colors, then layer the trash bags so that the colors are alternating if you like or keep the colors together.
-
2
Cut off the tops and the bottoms of the trash bags. Cut off the top 1" or so of the trash bag where the drawstring is. Discard this material.[9]
-
3
Fold the trash bags. Fold the trash bags so that the tops and bottoms are lined up. Try to get all of the layers as even as possible.
-
4
Cut the bags along the folded line. Cut the bags along the fold you just made so that you have a pile of 20 trash bag squares. Cut carefully and try not to leave any jagged edges.
-
5
Cut slits in the bag. Start cutting from the edge into the center from the side you just cut. Cut slits in the bags every 1/2 — 1", depending on your preference. Repeat the same cuts on the opposite side. Make the cuts from both ends and stop evenly, leaving roughly 2" uncut at the center.
-
6
Gather the bags. Gather the bags at the center, like holding a bunch of dry pasta, so that your fingers are around the uncut center and the strips you made are hanging. Secure the center by wrapping a bit of tape (electrical tape works best) around the uncut portion of the bags.
-
7
Fluff the pom pom. Next, take the individual strips and begin to separate each piece of plastic. This will give the pom pom its volume. Crinkle the strips of plastic once they’re pulled apart to make it even fuller.
- Your pom pom is ready to use! Make another so you have a matching pair.
Advertisement
-
1
Lay out eight sheets of tissue paper. Place the tissue paper on a flat surface and make sure that all of the edges are even.
- You can use less tissue paper for smaller pom poms, or more for larger, fuller pom poms.[10]
-
2
Fold length-wise in an accordion-fold pattern. Begin folding at one end of the tissue paper pile and fold the pieces in an accordion-fold pattern. This is when you fold the piece over in one direction first and then in the opposite direction after that. Keep folding in this alternating way until you reach the end of the stack.[11]
- If you want to make a small pom pom, then cut the strip in half after you do the accordion folds. This will give you two shorter strips that you can use to make pom poms.[12]
-
3
Cut both the ends of the folded paper stacks. You can cut the ends so that they are pointed or make them rounded. The look of your pom pom will be different depending on which style you choose.
-
4
Tie the middle of the folded tissue paper. Use a piece of fishing line, a wire, or a thick piece of thread to tie a knot around the middle of the folded tissue paper. Make sure that it is long enough so that you will be able to use it for hanging the pom pom when you are done.[13]
-
5
Open the layers one by one with your fingers.[14]
Take your time opening the layers one at a time to avoid tearing the tissue paper. However, keep in mind that a small tear will probably not be noticeable, so you do not need to start over if you tear the paper once or twice.[15] -

6
Hang the pom pom. When you are finished fanning out the pom pom, you can hang it up to display it. Hang it from a hook on a wall or ceiling.[16]

Advertisement
-
Question
How do you make easy pom poms?

Claire Donovan-Blackwood is the owner of Heart Handmade UK, a site dedicated to living a happy, creative life. She is a 12 year blogging veteran who loves making crafting and DIY as easy as possible for others, with a focus on mindfulness in making.
Arts & Crafts Specialist
Expert Answer
-
Question
How do you make a pom pom out of cardboard and yarn?
Claire Donovan-Blackwood is the owner of Heart Handmade UK, a site dedicated to living a happy, creative life. She is a 12 year blogging veteran who loves making crafting and DIY as easy as possible for others, with a focus on mindfulness in making.
Arts & Crafts Specialist
Expert Answer
Support wikiHow by
unlocking this expert answer.If you want to make a yarn pom pom, cut a piece of cardboard into a CD shape, but with a bigger hole in the middle like a donut. Repeat this step with a second piece of cardboard. Then, sandwich the donuts together and thread the yarn through there.
-
Question
Can I use string instead of yarn?
Yes. It may be a little harder to cut, but it will still work.
See more answers
Ask a Question
200 characters left
Include your email address to get a message when this question is answered.
Advertisement
Video
Things You’ll Need
- Cardboard cut into two rounds, to size of project requirements
- Yarn or thread (delicate embroidery projects might require small pom poms of cotton or silk thread)
- Scissors
- 10 trash bags
- Scissors
- Electrical tape
- Handle object, such as a spoon, dowel, or other stiff hand sized object (optional)
- Tissue paper
- Scissors
- Wire, fishing line, or strong thread
References
About This Article
To make a cheering pom pom, layer 10 trash bags on top of each other. If you’re using different colors, you can either layer the bags so the colors are alternating or keep the colors all together. Fold the trash bags in half hot-dog style and cut neatly along the folded line. Cut strips into the bag longways, stopping before you reach the center, and repeat on the opposite side. Leave about 2 inches of plastic uncut in the center. Grab the bags in the middle and wrap a piece around the center, then fluff out the plastic to give the pom pom its volume. For tips on how to make pom poms out of tissue paper or yarn, read on!
Did this summary help you?
Thanks to all authors for creating a page that has been read 968,183 times.
Reader Success Stories
-
Bonita McCormick
Aug 6, 2017
"Making a pom pom, instructions were so helpful. I have been crocheting for about 30-some years and I only learned…" more
Did this article help you?
Как надо и не надо делать ремонт?
Делать ремонт в доме может быть сложным и трудоемким процессом, но правильный подход и выполнение необходимых шагов могут значительно облегчить его. Вот некоторые советы о том, как нужно и не нужно делать ремонт:
Что нужно делать:
- Планируйте ремонт заранее. Рассмотрите все аспекты, такие как бюджет, продолжительность ремонта, необходимость аренды инструментов и мебели.
- Выберите правильных специалистов. Если вы нанимаете подрядчика, убедитесь, что он квалифицирован и имеет все необходимые разрешения и страховку. Также можно использовать рекомендации от друзей и знакомых.
- Планируйте ремонт в соответствии с вашими потребностями. Не увлекайтесь модными тенденциями, если они не подходят к вашему стилю и предпочтениям. Сделайте ремонт удобным и приятным для себя.
- Выбирайте качественные материалы. Инвестирование в качественные материалы может сэкономить деньги и время в будущем, так как они долговечны и не требуют постоянного ремонта.
- Обеспечьте безопасность на рабочей площадке. Убедитесь, что вы используете защиту глаз, маски и перчатки при работе с опасными материалами. Также обеспечьте безопасность своих детей и домашних животных.
Что не нужно делать:
- Не экономьте на качестве. Недостаточное качество материалов или услуг может привести к дополнительным расходам и проблемам в будущем.
- Не нарушайте правила безопасности. Избегайте работы в зоне высокого риска и не работайте без защиты глаз и легких.
- Не меняйте план в середине ремонта. Это может вызвать дополнительные расходы и задержки.
- Не делайте слишком много самостоятельно. Если вы не имеете достаточного опыта и знаний, лучше обратиться за помощью к профессионалам.
- Не забывайте о бюджете. Не делайте ремонт, который вы не можете позволить себе. Л
Добавить комментарий
Для отправки комментария вам необходимо авторизоваться.